
When it comes to product branding, industrial identification, or data tagging, custom metal labels offer unmatched durability and a premium look. At Mosen, we specialize in manufacturing high-quality metal labels tailored to your specific needs.
Here’s a comprehensive step-by-step guide to help you understand the customization process and get the perfect metal label for your application.
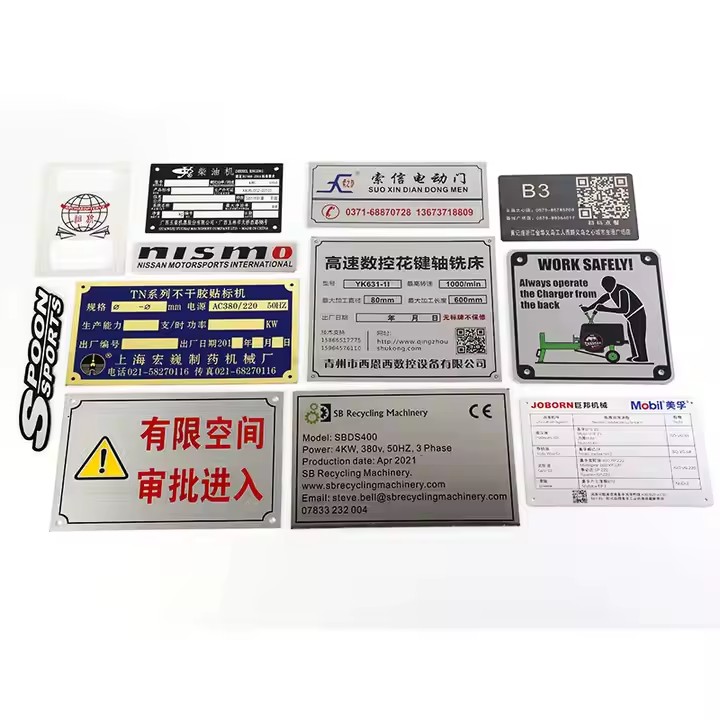
Step 1: Choose the Right Material
Different metals serve different purposes. Selecting the right base is crucial:
-
Aluminum – Lightweight, corrosion-resistant, suitable for printing and anodizing
-
Stainless Steel – Ideal for harsh environments and heavy-duty use
-
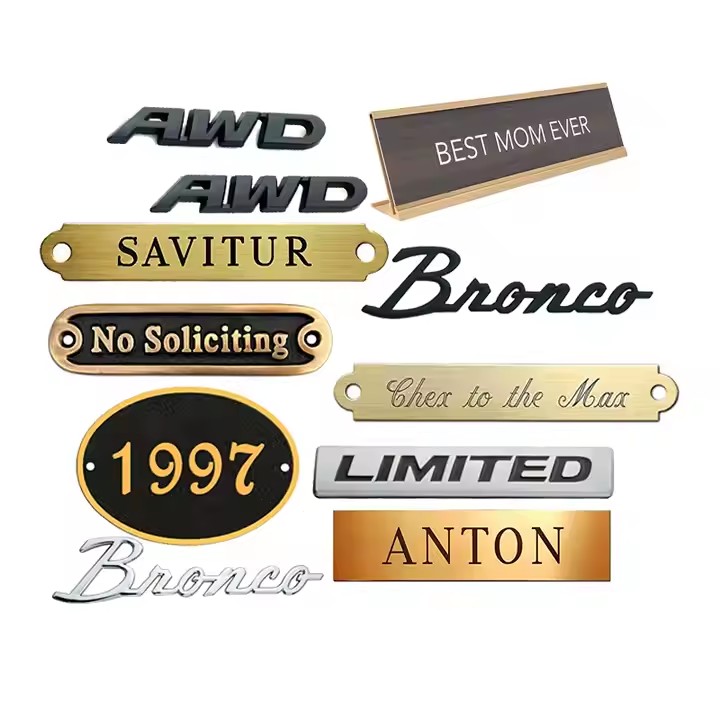
Brass – Luxurious finish, suitable for decorative and branding labels
-
Zinc Alloy (Zamak) – Used in die-casting for dimensional or logo-based labels
🔍 Tip: Consider environmental conditions like heat, moisture, and chemical exposure.
Step 2: Decide the Shape, Size & Thickness
You can customize:
-
Shape: Rectangular, oval, circular, or fully custom contours
-
Size: Any dimensions, based on where and how it will be applied
-
Thickness: Ranges from 0.3 mm to 3 mm depending on rigidity and depth requirements
Step 3: Select the Surface Finish
Surface treatment affects aesthetics, readability, and durability:
-
Brushed / Matte / Mirror Finish
-
Anodized Color Coating
-
Electroplating (Gold, Silver, Nickel, Chrome)
-
Antique Finish (Brass, Bronze, Copper)
-
Protective Clear Lacquer (UV & scratch-resistant)
Step 4: Choose a Printing or Marking Method
Each method offers different levels of durability and visual effect:
-
Laser Engraving – Permanent and precise
-
UV Printing – Full color, high resolution
-
Screen Printing – Spot color, cost-effective
-
Etching with Fill – Chemical or laser etching + paint infill
-
Embossing/Debossing – Raised or recessed surface for tactile effect
-
Die-Casting – 3D logo or emblem labels
Step 5: Confirm Mounting or Adhesion Requirements
Based on where your label will go, choose one of the following:
-
3M Adhesive Backing – Quick and clean installation
-
Screw Holes / Rivet Holes – Permanent and secure mounting
-
Magnet or Stud Fixing – For reusable or removable applications
-
No Backing – Ideal for welding or embedding during assembly
Step 6: Prepare & Submit Your Artwork
Send us your design file in vector format (AI, PDF, SVG, or CDR).
If you don’t have one, our team can help you create or adjust the layout.
We’ll send a digital proof for confirmation before production.
Step 7: Receive a Quote & Confirm Your Order
We provide fast, accurate quotations based on:
-
Size, quantity, and material
-
Design complexity
-
Finishing & mounting methods
-
Packaging preferences
👉 Contact us at senka@greatmosen.com or use our customization form
Step 8: Production & Delivery
Once confirmed:
-
Standard lead time: 7–15 days depending on order size
-
All labels undergo strict QC (engraving quality, surface finish, adhesion strength)
-
Shipped globally via DHL, FedEx, UPS or freight as needed
✅ Why Customize with Mosen?
-
Over 10 years of OEM/ODM experience
-
One-stop in-house production: die-cutting, printing, engraving, packaging
-
Free artwork assistance
-
Fast response and global delivery
-
Flexible MOQ to support small and bulk orders
📩 Ready to start your metal label project?
👉 How to Customize
📧 Email us: senka@greatmosen.com